概述
本文讲述如何使用 kubeadm 在腾讯云上搭建一个 IPv4/IPv6 双栈网络 Kuberentes 集群,全文使用到的项目如下:
Docker 20.10.21
Kuberentes v1.23.14
Calico v3.24.5
dula-stack
前期准备
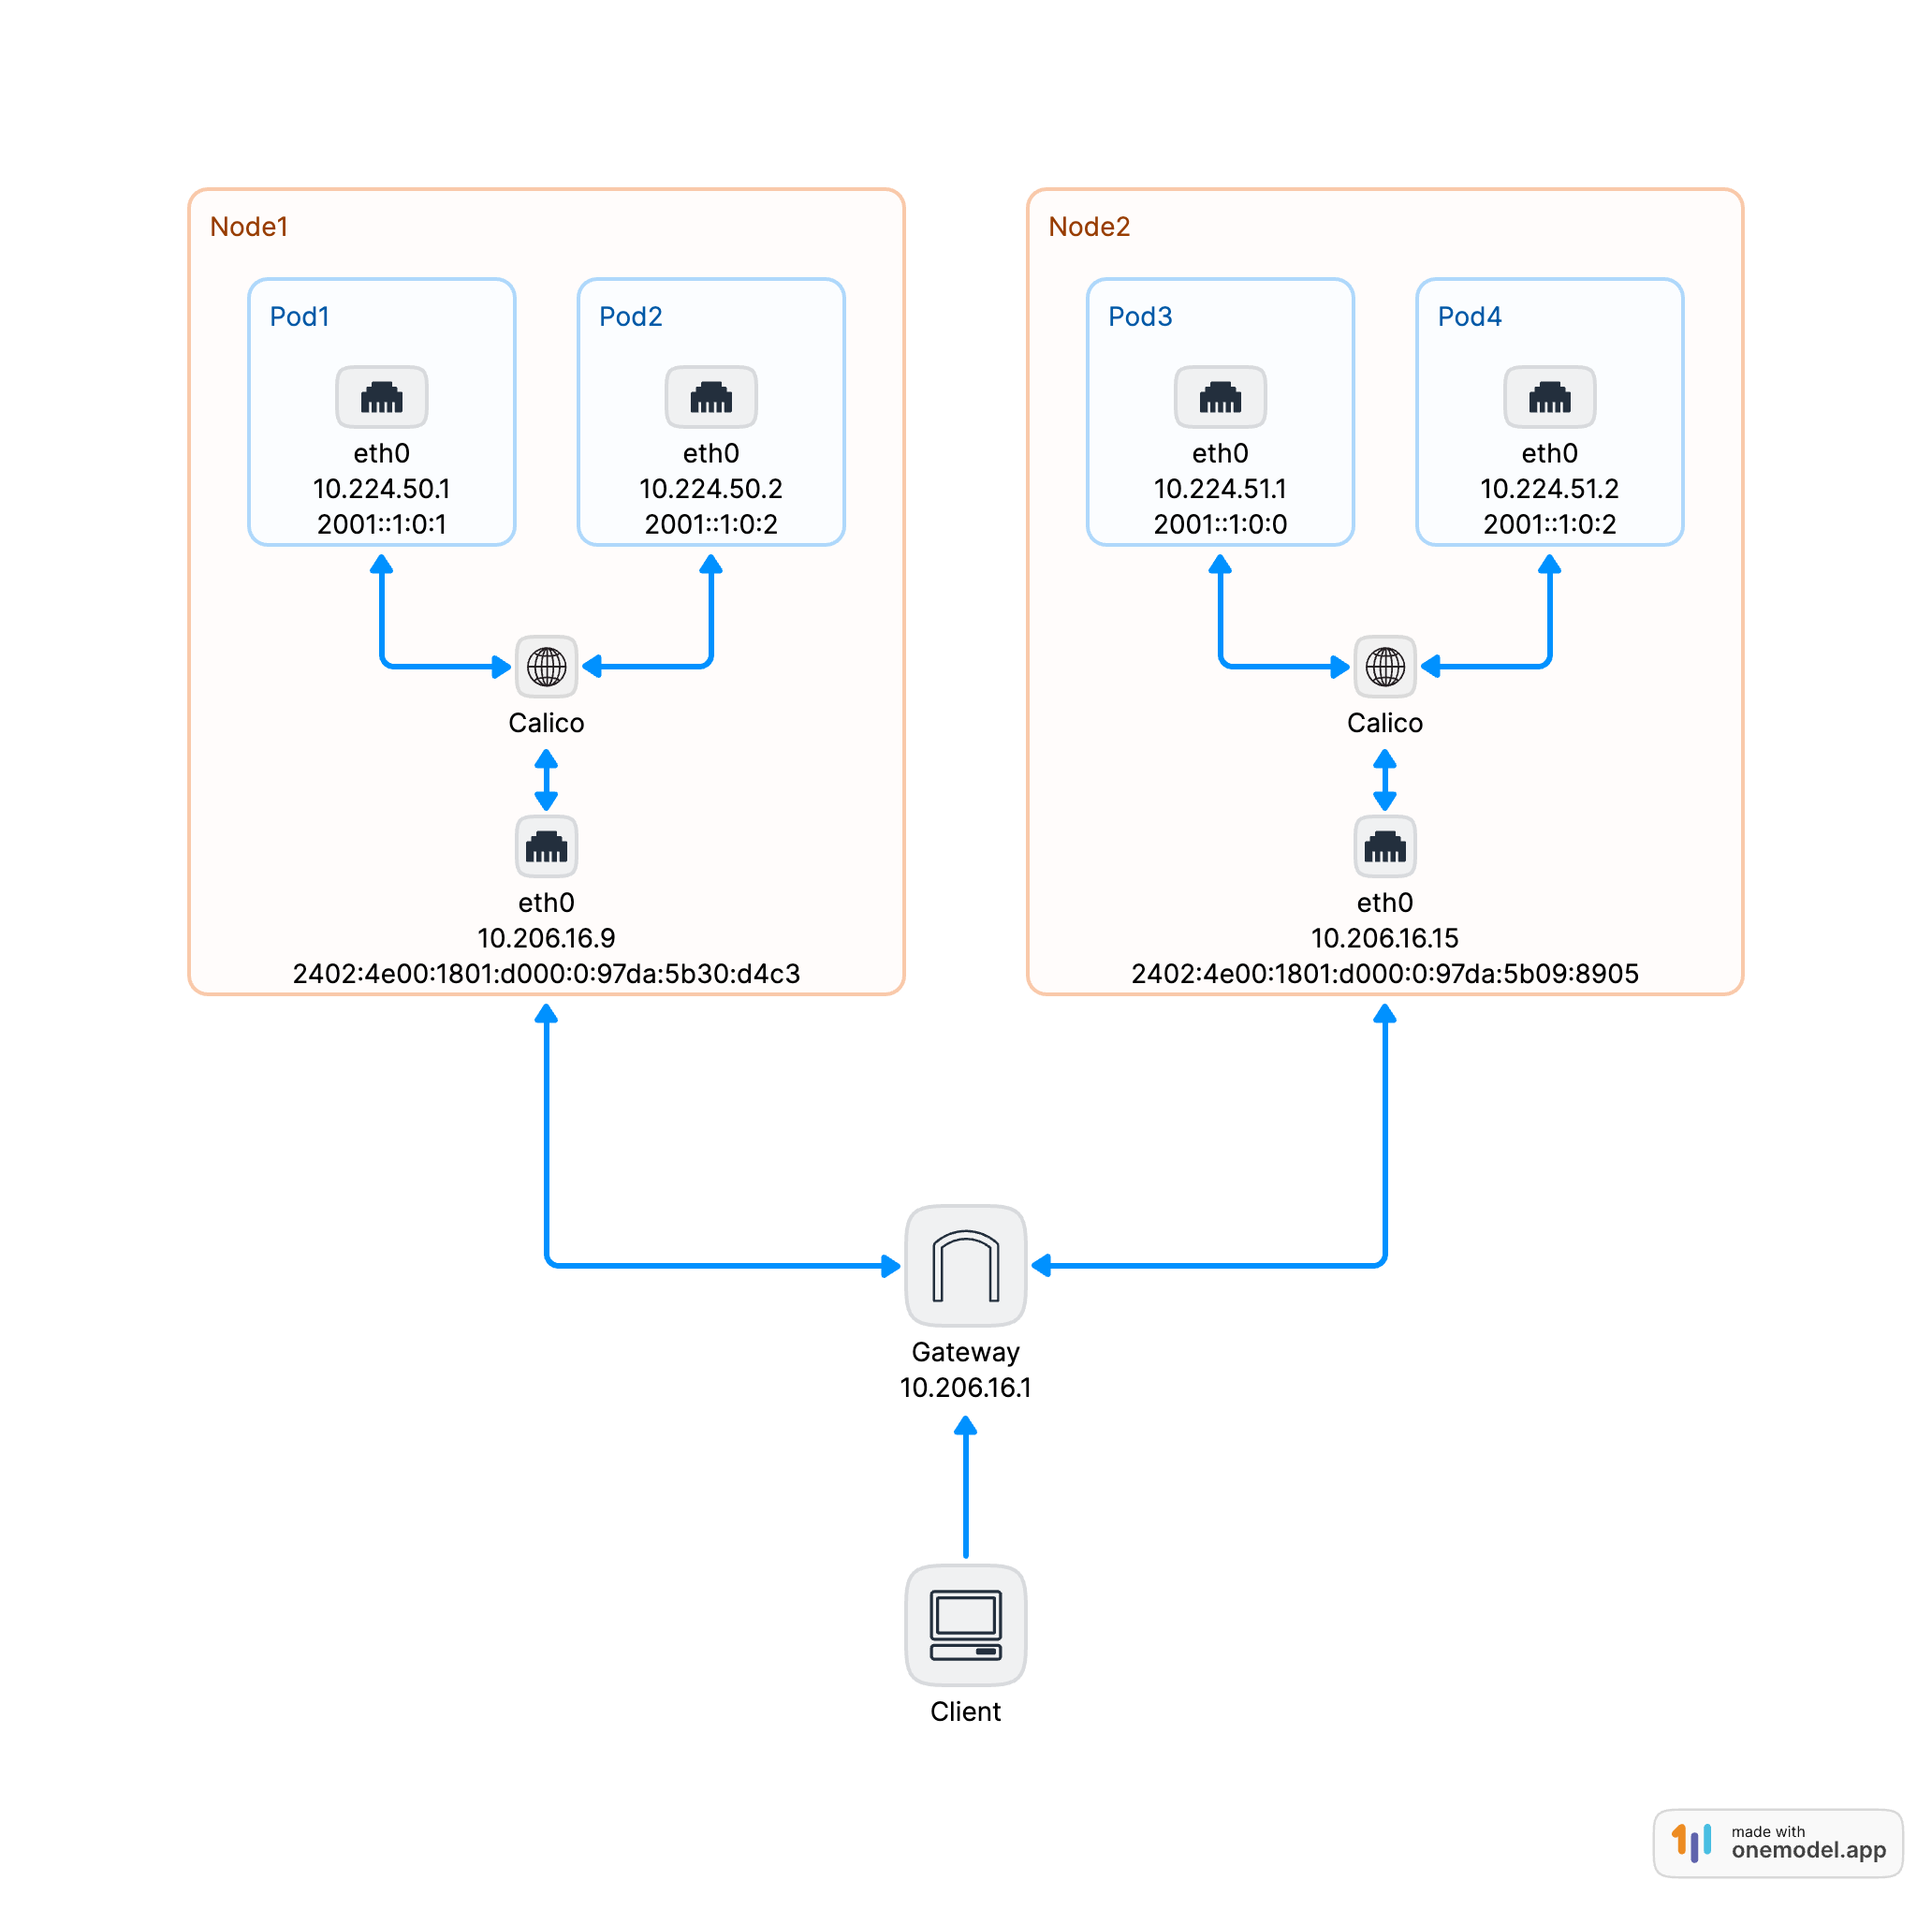
在腾讯云购买两台云服务器, 服务器需要启用 IPv6
机器 IPv4 IPv6 说明 VM-16-9-centos 10.206.16.9 2402:4e00:1801:d000:0:97da:5b30:d4c3 Master 节点 VM-16-15-centos 10.206.16.15 2402:4e00:1801:d000:0:97da:5b09:8905 Worker 节点 系统配置
# 关闭防火墙
systemctl stop firewalld
systemctl disable firewalld

# 禁用 SELinux
sed -ri 's/SELINUX=enforcing/SELINUX=disabled/' /etc/selinux/config
setenforce 0
getenforce

# 禁用交换分区 (云服务器默认已经禁用)
swapoff -a
sed -i /^[^#]*swap*/s/^/\#/g /etc/fstab

# 设置内核参数
echo 'net.ipv6.conf.all.forwarding = 1' >> /etc/sysctl.conf
echo 'net.ipv4.ip_forward = 1' >> /etc/sysctl.conf

sysctl -p
安装 docker
# 安装 docker
yum install -y yum-utils && \
yum-config-manager --add-repo https://download.docker.com/linux/centos/docker-ce.repo && \
yum install -y docker-ce docker-ce-cli containerd.io

# 修改 daemon.json
mkdir -p /etc/docker
cat > /etc/docker/daemon.json <<EOF
{
  "exec-opts": ["native.cgroupdriver=systemd"]
}
EOF

# 重启 docker
systemctl enable docker
systemctl restart docker
安装 kubeadm、kubelet 和 kubectl
# 添加 kuberentes 阿里云源
cat <<EOF > /etc/yum.repos.d/kubernetes.repo
[kubernetes]
name=Kubernetes
baseurl=https://mirrors.aliyun.com/kubernetes/yum/repos/kubernetes-el7-x86_64/
enabled=1
gpgcheck=1
repo_gpgcheck=1
gpgkey=https://mirrors.aliyun.com/kubernetes/yum/doc/yum-key.gpg https://mirrors.aliyun.com/kubernetes/yum/doc/rpm-package-key.gpg
EOF

# 安装 kubeadm、kubelet 和 kubectl
yum install -y --nogpgcheck kubelet-1.23.14-0 kubeadm-1.23.14-0 kubectl-1.23.14-0

# 启动 kubelet
systemctl enable --now kubelet
安装
初始化 Master 节点
---
apiVersion: kubeadm.k8s.io/v1beta3
kind: ClusterConfiguration
networking:
  podSubnet: 10.244.0.0/16,2001:db8:42:0::/56
  serviceSubnet: 10.96.0.0/16,2001:db8:42:1::/112
imageRepository: "registry.cn-hangzhou.aliyuncs.com/google_containers"
kubernetesVersion: "v1.23.14"
---
apiVersion: kubeadm.k8s.io/v1beta3
kind: InitConfiguration
localAPIEndpoint:
  advertiseAddress: "10.206.16.9"
  bindPort: 6443
nodeRegistration:
  kubeletExtraArgs:
    node-ip: 10.206.16.9,2402:4e00:1801:d000:0:97da:5b30:d4c3
  taints: []
将以上内容复制到 master 节点的
init.yaml文件中, 然后执行kubadm init --config init.yaml初始化 Master 节点安装 Calico (使用 operator 的方式安装)
a. 安装 tigera operator
# 部署 tigera operator
kubectl create -f https://raw.githubusercontent.com/projectcalico/calico/v3.24.5/manifests/tigera-operator.yaml
b. 安装 calico
# This section includes base Calico installation configuration.
# For more information, see: https://projectcalico.docs.tigera.io/master/reference/installation/api#operator.tigera.io/v1.Installation
apiVersion: operator.tigera.io/v1
kind: Installation
metadata:
  name: default
spec:
  # Configures Calico networking.
  calicoNetwork:
    # Note: The ipPools section cannot be modified post-install.
    ipPools:
      - blockSize: 26
        cidr: 10.244.0.0/16
        encapsulation: IPIP
        natOutgoing: Enabled
        nodeSelector: all()
      - blockSize: 122
        cidr: 2001:db8:42:0::/56
        encapsulation: VXLANCrossSubnet
        natOutgoing: Enabled
        nodeSelector: all()
---

# This section configures the Calico API server.
# For more information, see: https://projectcalico.docs.tigera.io/master/reference/installation/api#operator.tigera.io/v1.APIServer
apiVersion: operator.tigera.io/v1
kind: APIServer
metadata:
  name: default
spec: {}
将以上内容复制到 master 节点的
custom-resources.yaml文件中,然后执行kubectl apply -f custom-resources.yaml初始化 Worker 节点
在 master 节点执行
kubeadm token create --print-join-command命令获取 token 和 caCertHashesapiVersion: kubeadm.k8s.io/v1beta3 kind: JoinConfiguration discovery: bootstrapToken: apiServerEndpoint: 10.206.16.9:6443 token: "uufww4.on27548bh3yomo9e" # 替换成当前的 token caCertHashes: - "sha256:f75e342b7e77c2b276bd2490b352d3ea9253de33c9ce5610798a05b5739323e1" # 替换成当前的 caCertHashes # change auth info above to match the actual token and CA certificate hash for your cluster nodeRegistration: kubeletExtraArgs: node-ip: 10.206.16.1,2402:4e00:1801:d000:0:97da:5b09:8905
测试
创建测试工作负载
---
apiVersion: apps/v1
kind: Deployment
metadata:
  name: nginx
  labels:
    app: nginx
spec:
  selector:
    matchLabels:
      app: nginx
  template:
    metadata:
      labels:
        app: nginx
    spec:
      containers:
        - name: nginx
          image: nginx:latest
          ports:
            - containerPort: 80
---
apiVersion: v1
kind: Service
metadata:
  name: nginx
  labels:
    app: nginx
spec:
  selector:
    app: nginx
  ipFamilyPolicy: PreferDualStack
  ports:
    - port: 80
      targetPort: 80
      protocol: TCP
  type: NodePort
查看 Pod 和 Service 的 IP
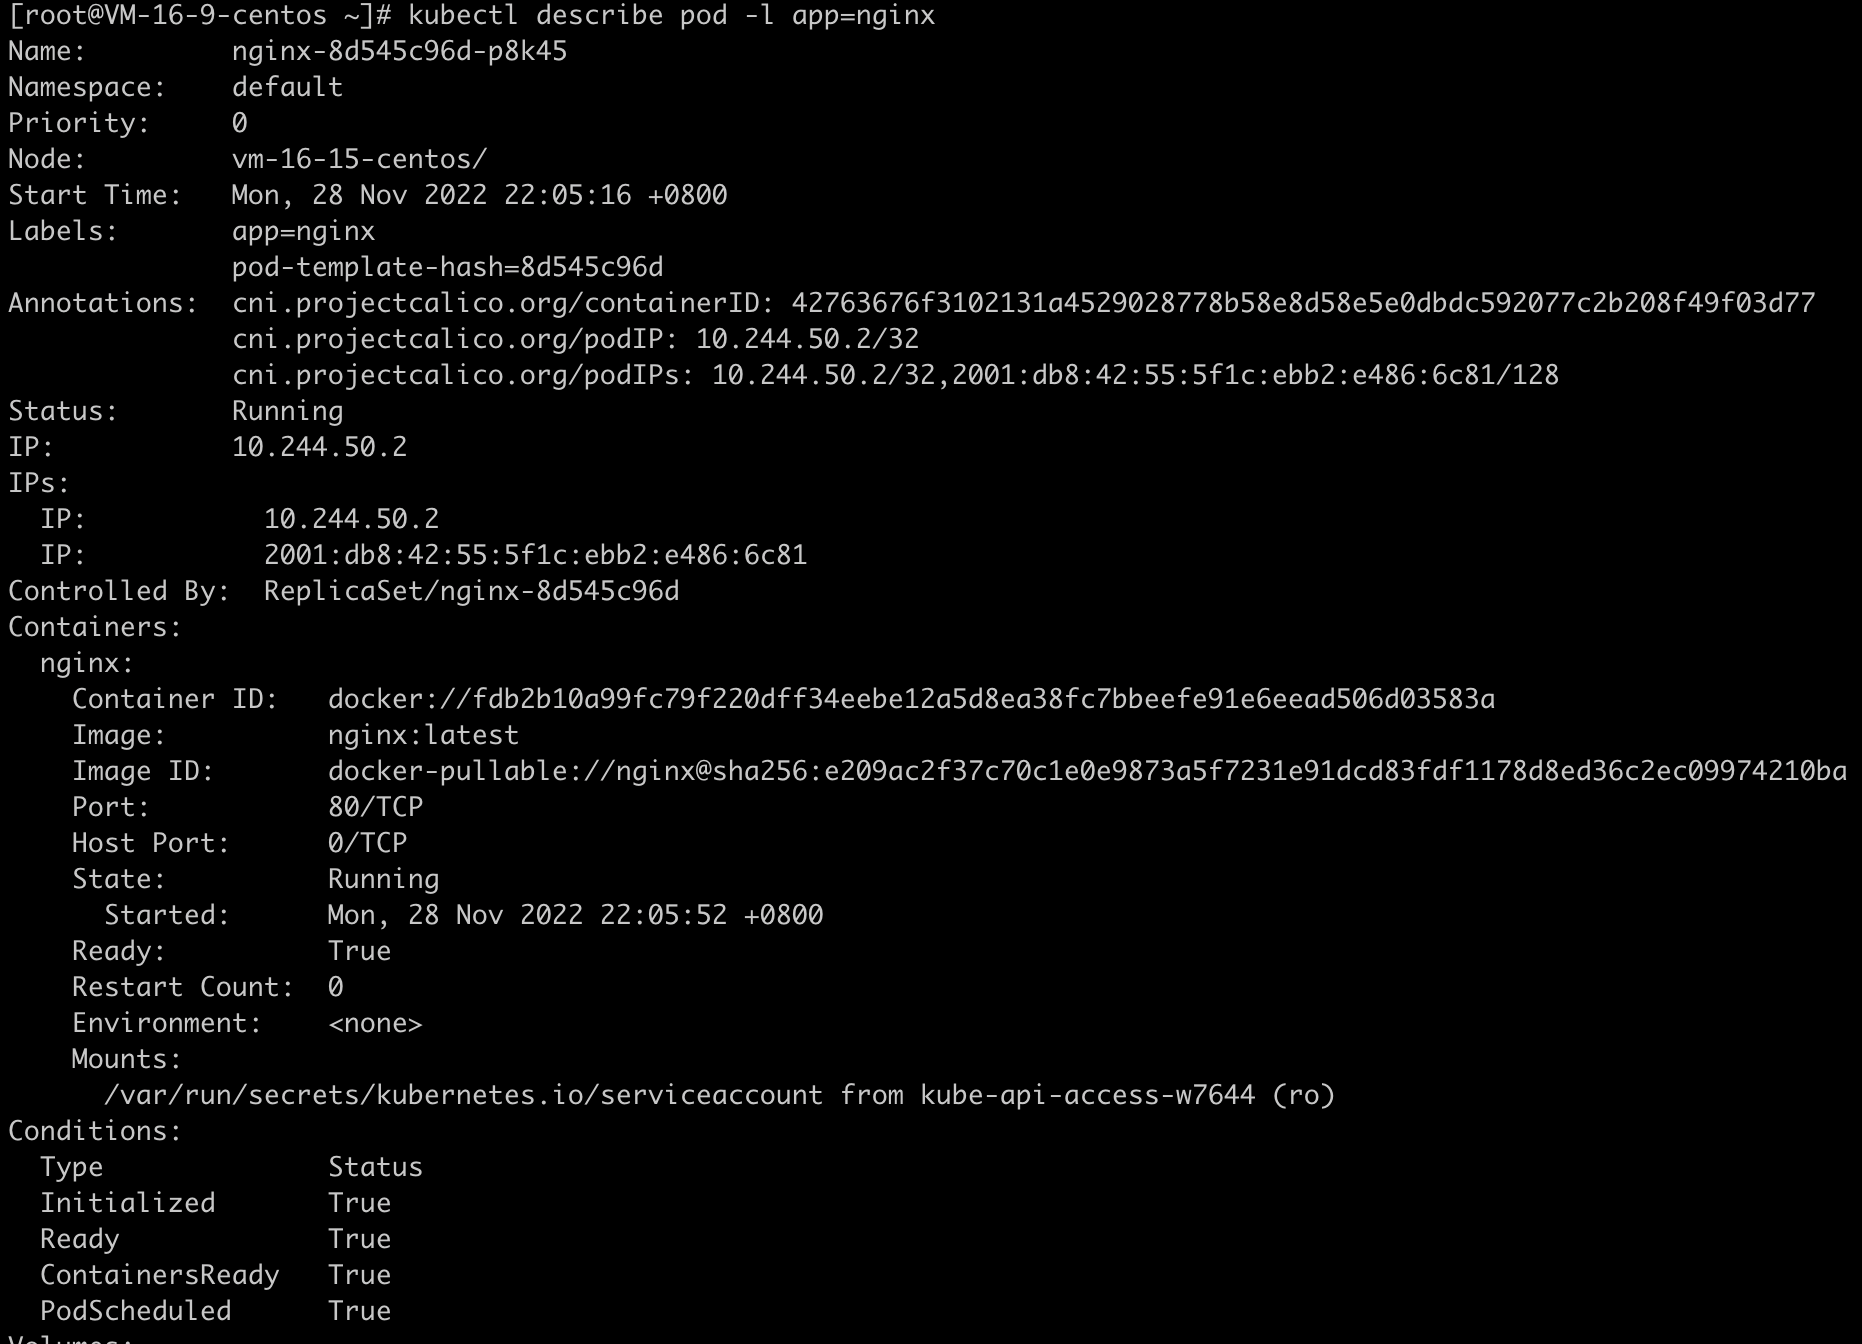
Pod 的 IPv4 和 IPv6 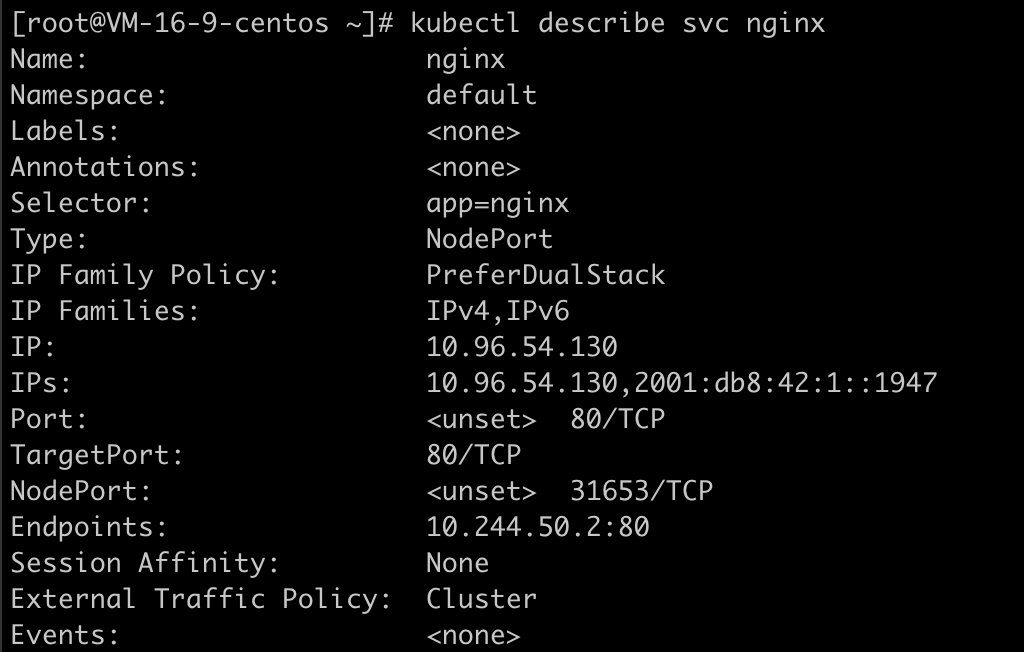
Service 的 IPv4 和 IPv6 通过 Pod 的 IPv4 和 IPv6 访问
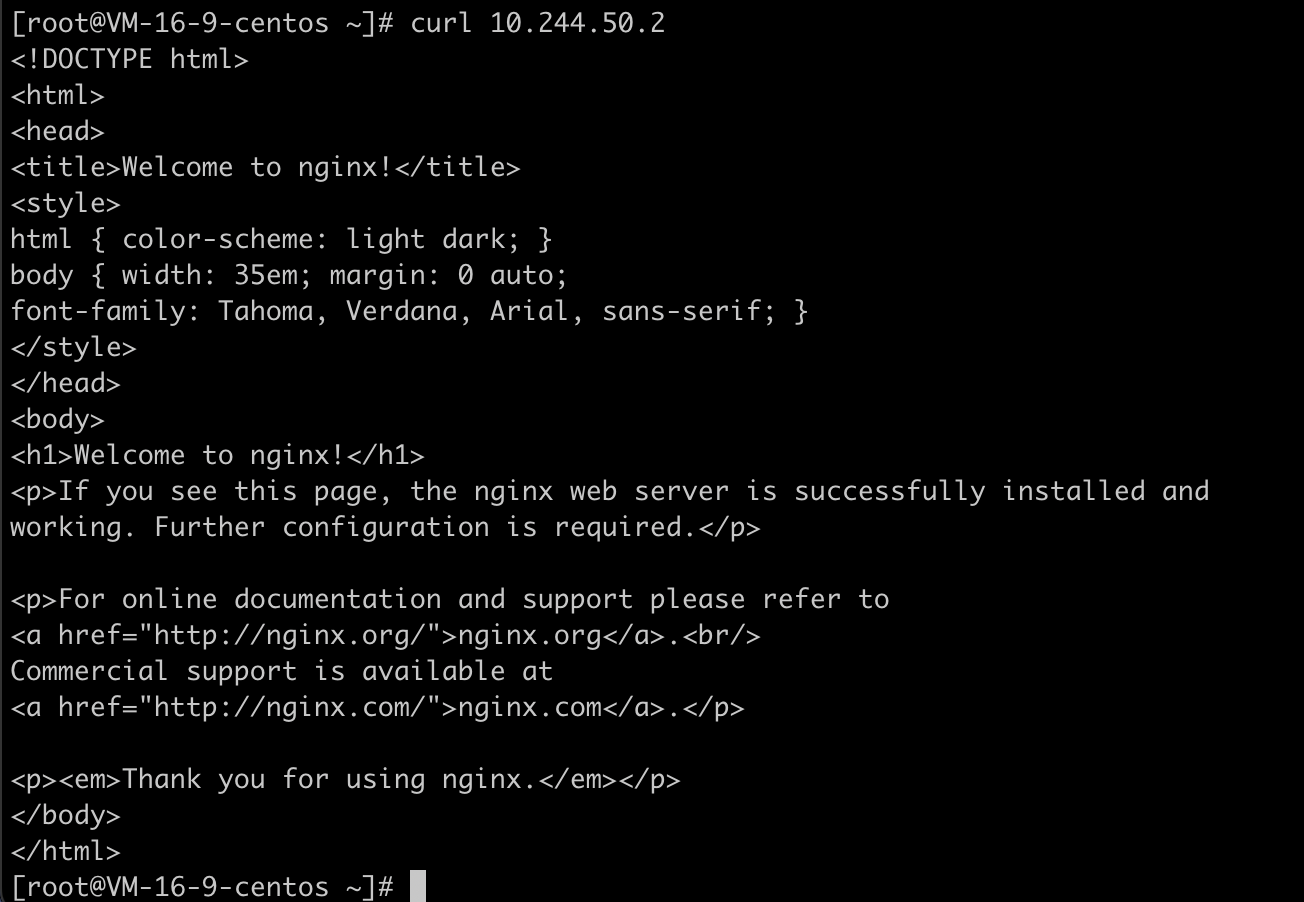
通过 Pod 的 IPv4 访问 
通过 Pod 的 IPv6 访问 通过 Service 的 IPv4 和 IPv6 访问
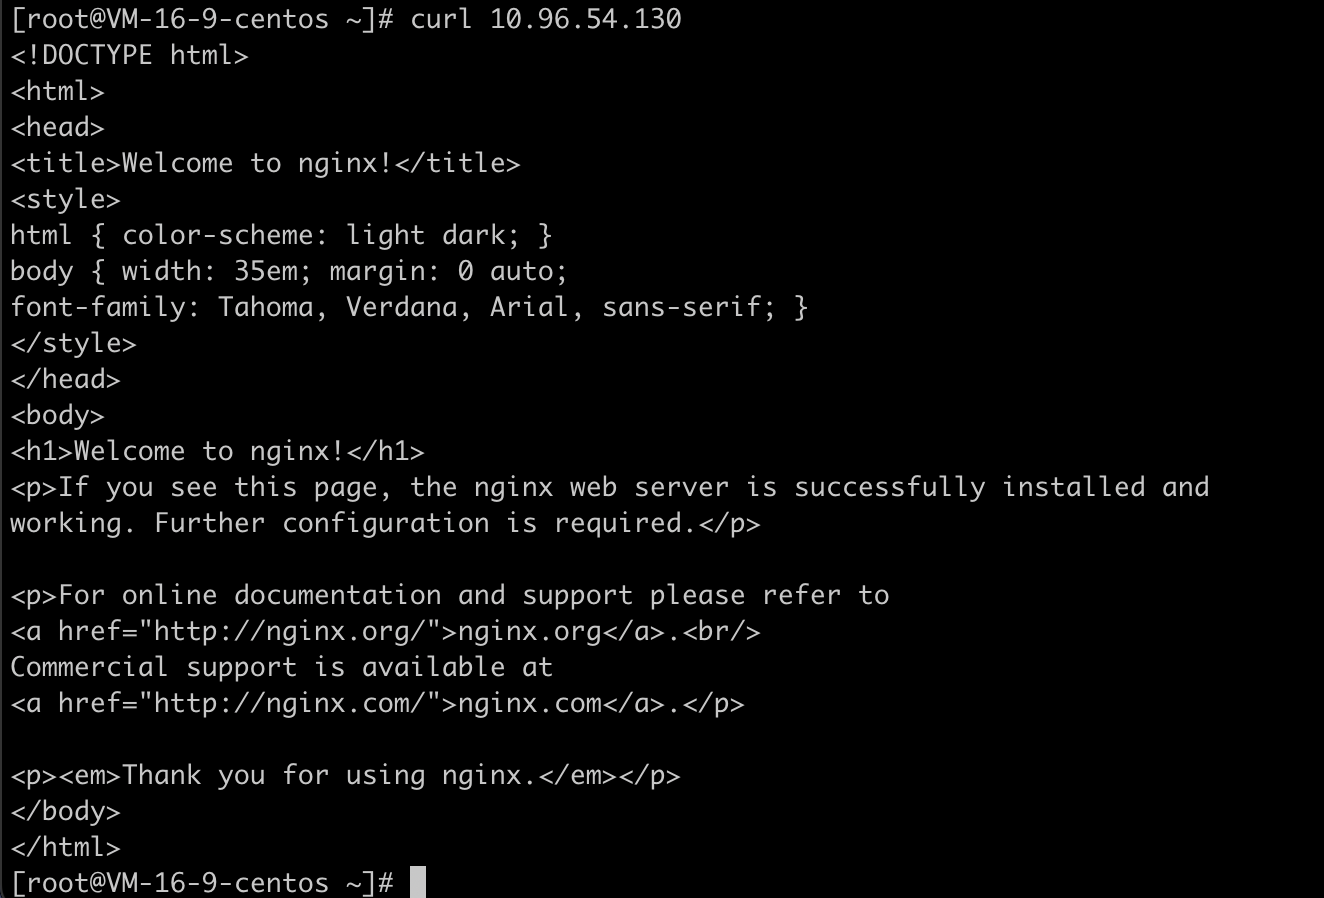
通过 Service 的 IPv4 访问 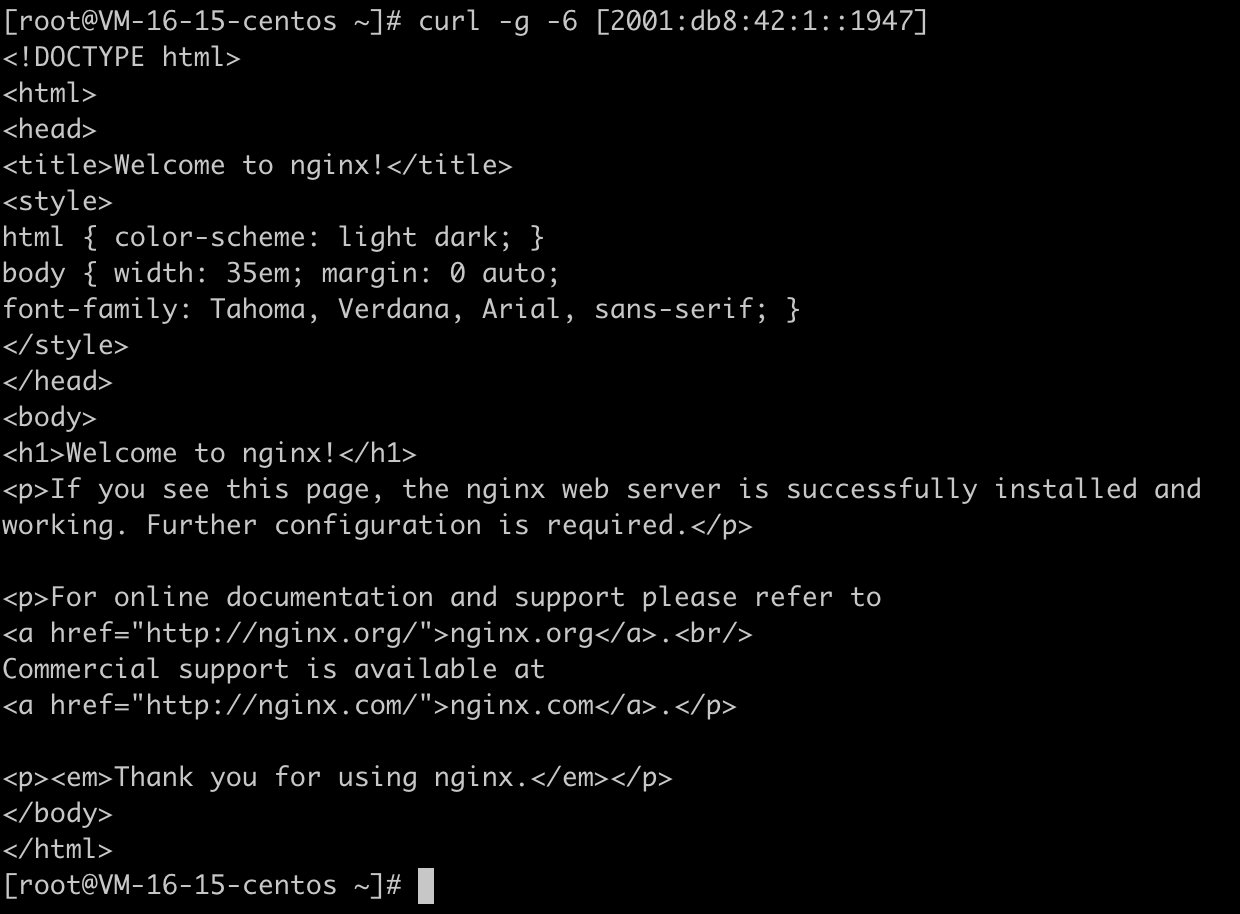
通过 Service 的 IPv6 访问 通过 NodePort 访问
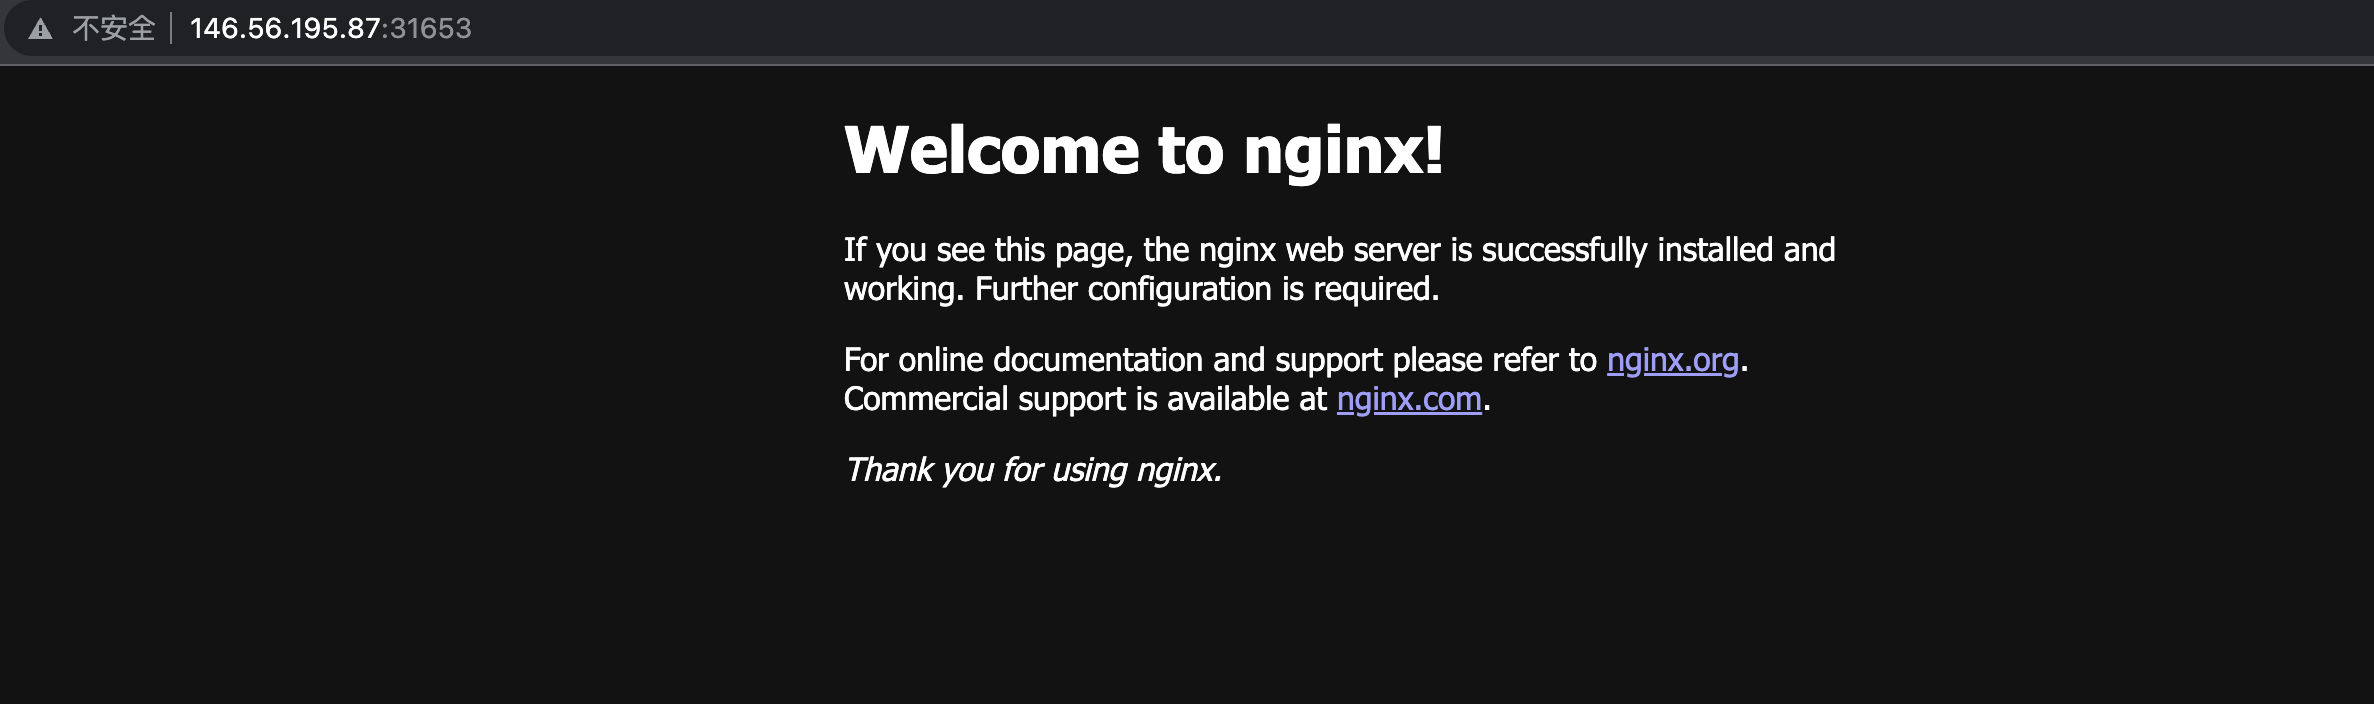
通过 IPv4 访问 NodePort 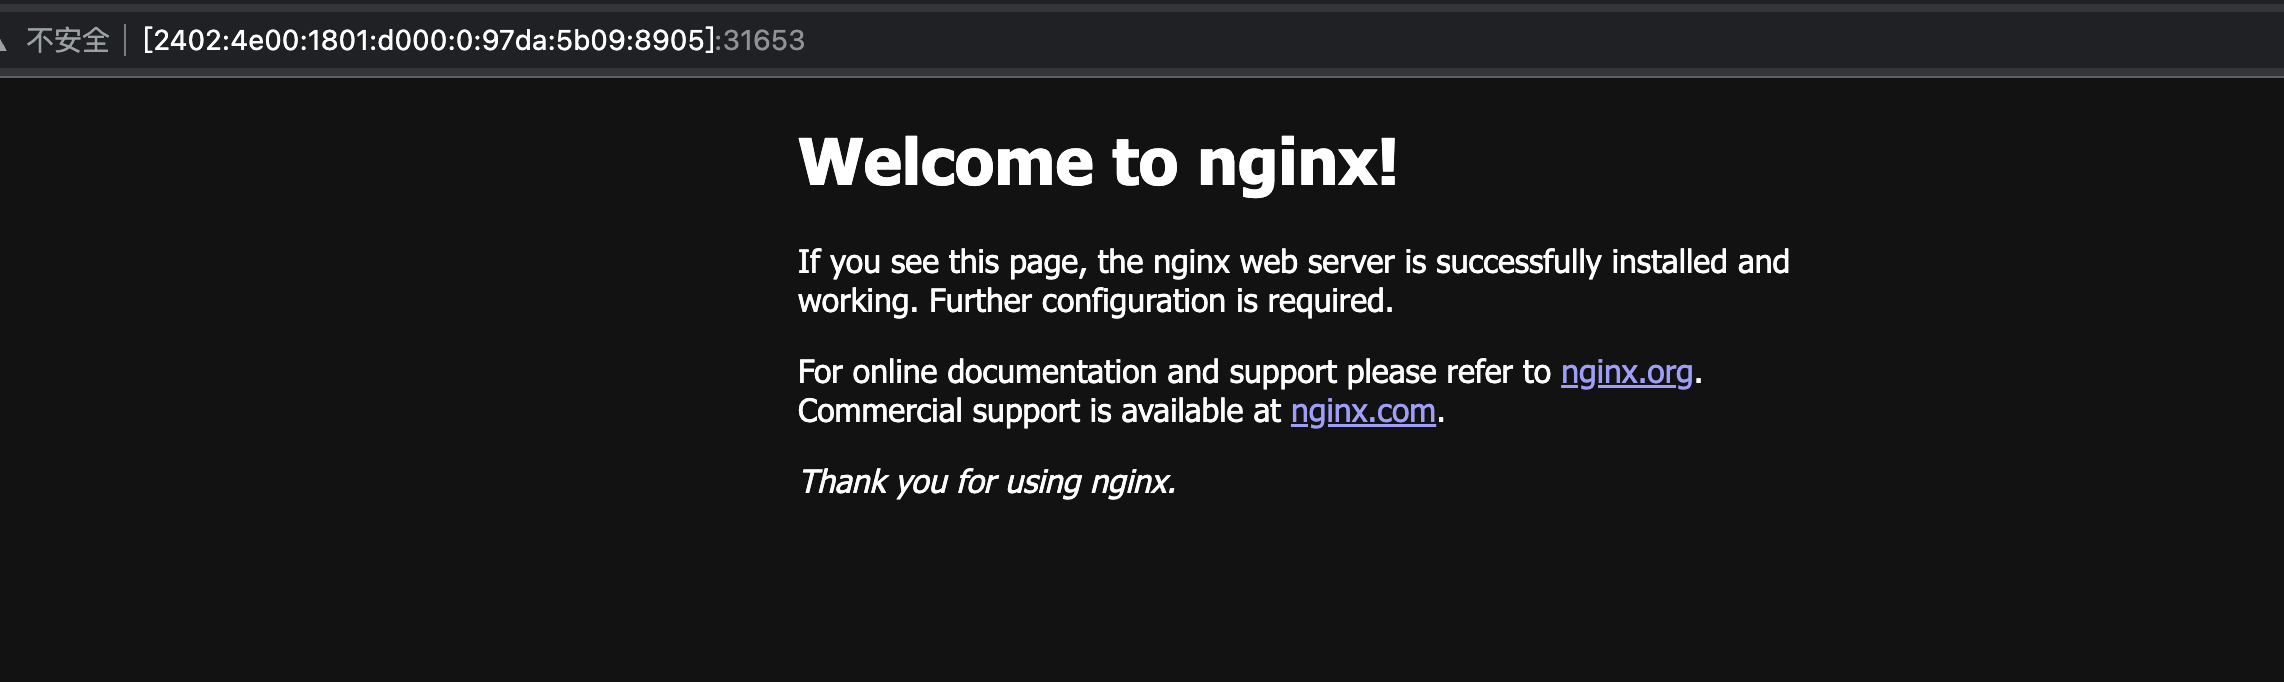
通过 IPv6 访问 NodePort